Prepare an extra flaky, gluten free pie crust when you follow this recipe. Whatever pie you’re craving, this is the only gf pie crust recipe you need.
Jump to Recipe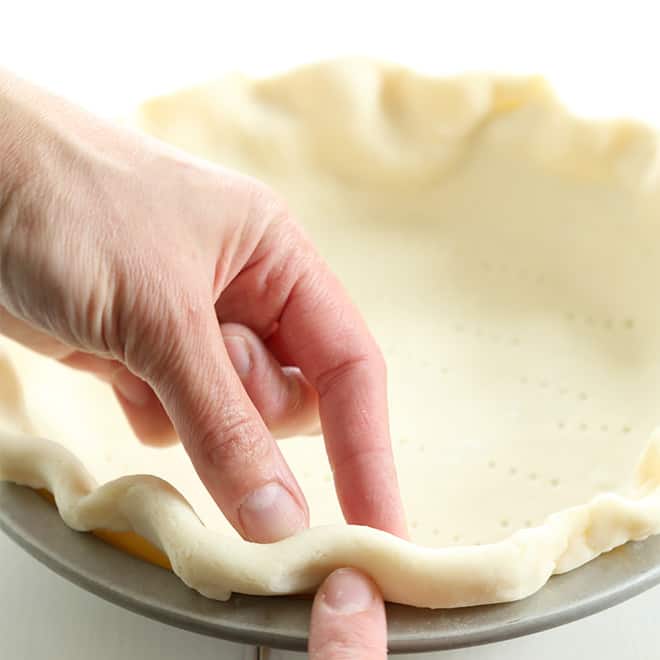
Gluten free baking does not have to be a bore, especially if armed with a range of delicious, easy gluten free recipes that get the texture just right. Although cooking for a gluten free diet requires a change in a few ingredients, my range of versatile gluten free (gf) flour mixes can be applied to just about any recipe out there – with impressive results.
Take, for instance, perfecting the home-baked pie crust. If you are adding a delicious apple or pecan pie to your gluten free baking repertoire during the fall or winter, or a no-bake pie during the summer, you’ll definitely want to try my recipe for a light and extra flaky gluten free pie crust.
This perfect pie crust is tender and flaky where it counts, rolls out perfectly every time, and you can use it for single or double-crust pie recipes. I promise that once you’ve got the hang of it, you’ll never settle for any of those dry, pre-made, store-bought pie crusts again.

Common pie crust challenges and solutions
Pie crust can either be too tough, soggy, or too crumbly, or the edges can shrink during baking. A disappointing pie crust is often the result of adding too much or too little moisture, overprocessing the butter so it melts into the flour rather than expanding into it in the oven, not allowing enough time for the dough to chill, or underbaking it in an oven that’s not hot enough.
How to make the perfect gluten free pie crust
I find that the common method of making the pie crust into “pea-sized pieces” tends to make tougher crusts. So I don’t recommend making this pie crust using anything other than a bowl and a spoon: a stand mixer can be useful but does run the risk of creating too-small pieces of butter, and I wouldn’t recommend a food processor either (if you must use a food processor, process the dough as little as possible!)
Working with a bowl and spoon makes it possible to create large but flat and solid pieces of fat that are evenly distributed throughout the raw dough, which is how you get those fabulous flaky layers!
How do I prevent the crust from becoming soggy?
While getting your temperatures and ingredients right helps solve other texture issues, parbaking your crust for ten minutes helps avoid soggy pie crusts.
If you’re parbaking your crust, as directed in the full pie crust recipe below, you’ll know it’s done baking when it is very lightly golden brown on the edges. The bottom of the crust should be less shiny but not browned; the browning happens when you’ve filled the crust with your filling of choice and finished baking the pie.
To par-bake your crust, line the crust with parchment paper, fill it with ceramic pie weight or dried beans, and bake it at 375°F for 10 minutes. Remove the parchment and the pie weights, and return the pie to the oven to bake uncovered for about another 2 to 4 minutes or until the bottom of the crust is pale and no longer shiny. Proceed with the pie filling recipe of your choice.
To blind bake the crust, which you would do if you aren’t going to bake the pie again and instead fill it with a no-bake filling, cover it just the same, with parchment and pie weights and bake for 10 minutes at 375°F, just like par baking. Remove the parchment and pie weights and bake again, but this time return the pie to the oven for about another 7 minutes, or until even the bottom of the pie is starting to take on some light brown color. Let it cool completely before filling as instructed by whatever no bake filling you choose.
The “science” behind an extra flaky gluten free pie crust
Add sour cream
The secret ingredient that makes this gluten free pie crust so effortlessly flaky is the sour cream. My recipe calls for 120g of full-fat sour cream – preferably chilled. Why? As a fatty, creamy, and tangy dairy product, sour cream adds wonderful richness and moisture to any cake or baked item without thinning the batter like water, milk, or buttermilk would.
Thin pie pastry can become hard and leathery, so you need just the right amount of moisture to ensure the pastry dough sticks together when you roll it out or crimp the edges. Sour cream is perfect for this.
Keep ingredients cold
As with most baked pasties, keeping all your pie crust ingredients cold (or chilled) while you’re working with them is also key to achieving the right flaky texture.
When exposed to the heat of the preheated oven, the cold ingredients, especially the added fat (usually butter, or sometimes lard, solid coconut oil, or shortening), evaporate and push out the surrounding dry ingredients, creating flaky, crispy layers.
I start with solid chunks of butter, which I then coat in the dry ingredients before flattening them with my fingers, to keep the fat cold. I also use a variation of my gluten free pastry flour with added cornstarch and milk powder for extra lightness and tenderness.
Top tips for the perfect gluten free flaky pie crust
My basic principles of flaky pastry-making remain the same:
- Begin with relatively large chunks of butter (no pea-sized bits, please!), coat them in dry ingredients, and then flatten them between your thumb and forefinger. That way, when the butter melts a bit as you’re working with the pastry, it will firm back up when you chill the shaped pastry.
- Rather than using ice water to bring the dough together, use sour cream, which will also add tenderness to the dough that is like nothing else.
- Be sure to lift the pie crust up and into the bottom and sides of the pie plate rather than attempting to stretch it. That’ll keep it from shrinking during baking.
- I’ve included instructions for par-baking the crust in the full recipe below, but your gluten free pie recipe may or may not require that step.
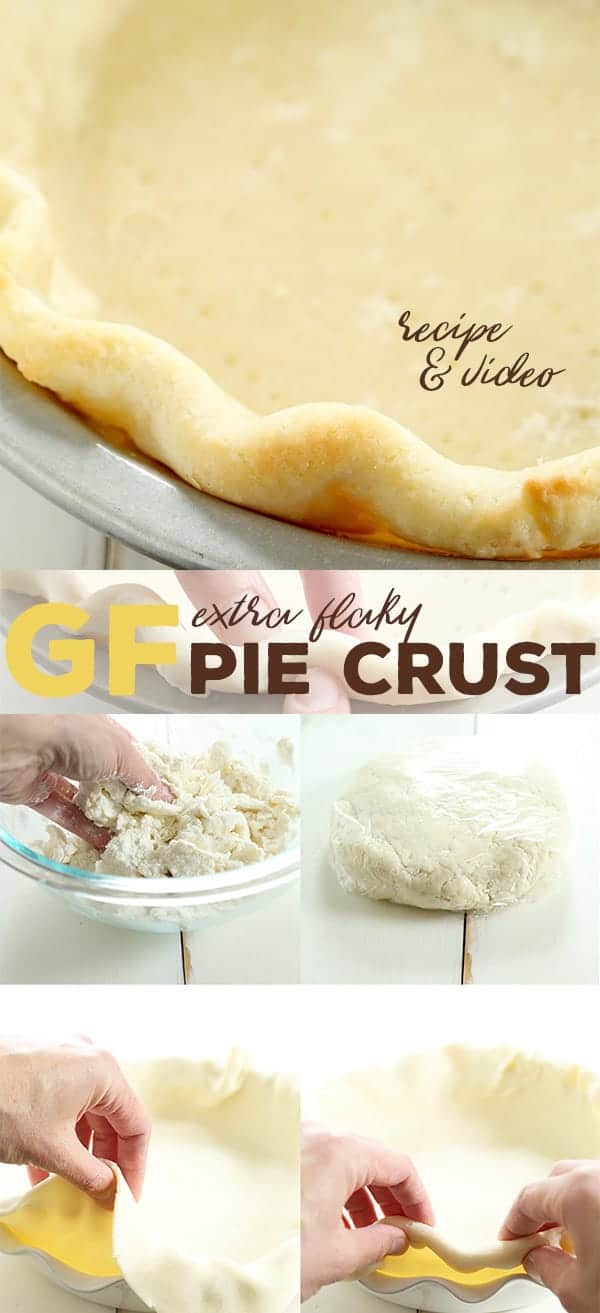
If you’re a visual learner, I’ve created a how-to video to help show every stage of pie-crust making. It also explains how to smooth and roll out the chilled dough and shape it in the pie plate.

How to crimp the edges of your pie crust
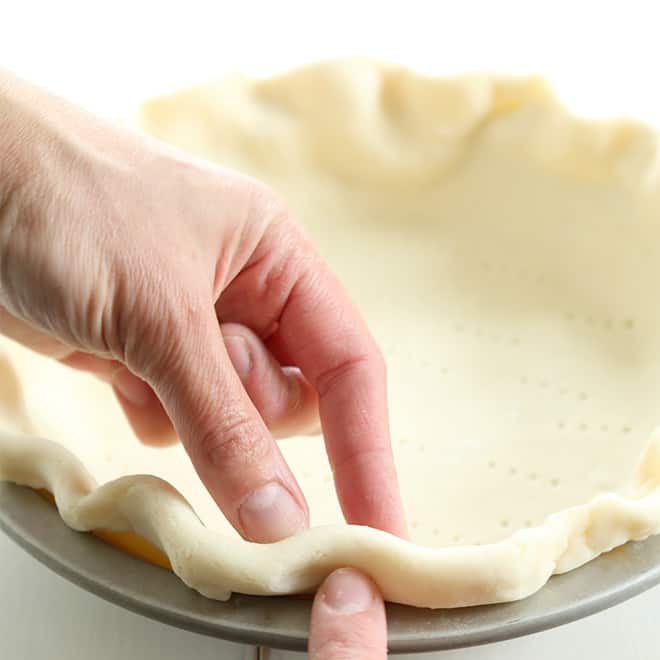
There are a few ways to decorate a baked gluten free pie – one of them is to crimp the edges. To do this, place the thumb and forefinger of one hand about one inch apart on the edge of the pie crust pointing from the inside out.
From the outside in, press the knuckle of the forefinger of your other hand in the center of the other two fingers.
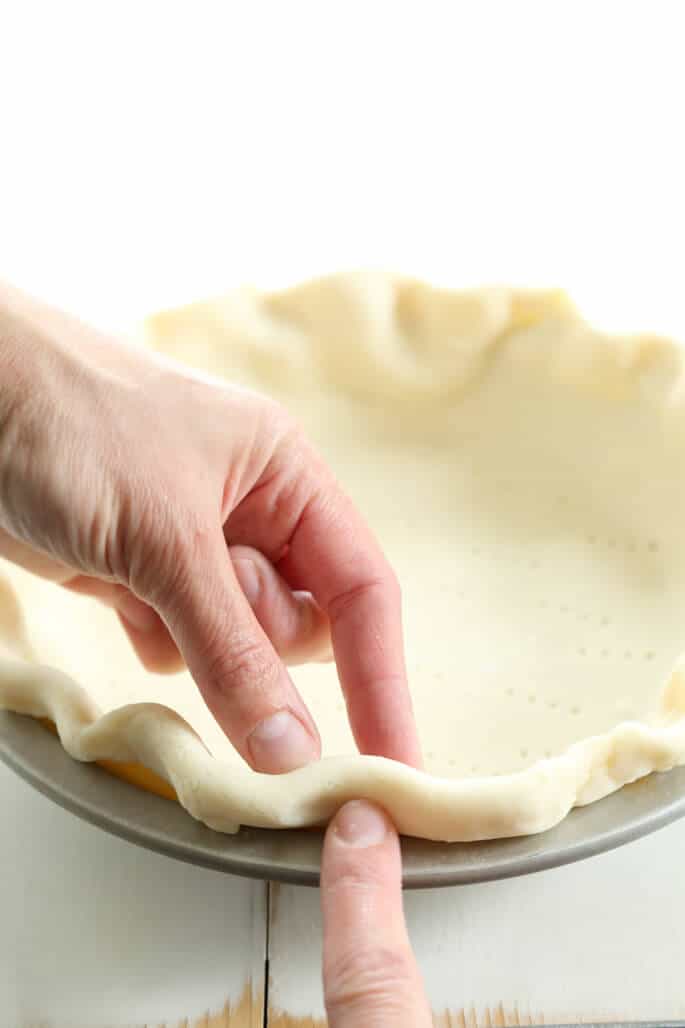
Gently pinch the inside fingers together around the outside knuckle. Move around the whole perimeter of the crust, repeating the process inch by inch, and you’ll have a beautiful crimped edge.
Personalizing your gluten free pie crust: substitution suggestions
My extra flaky gluten free pie crust can be modified easily for other dietary requirements.
Gluten free, dairy free crust
I often get asked about making this extra flaky gluten free pie crust dairy-free. My first and best suggestion is to use avoid using sour cream at all by following the alternate recipe listed below for “how to make a gluten free pie crust without sour cream.”
Be sure your all purpose gluten free flour blend is dairy-free, as well, if you’re going to make that recipe dairy-free. Although I typically recommend my using my gluten free pastry flour blend in pastries, it contains milk powder, so be sure to use coconut milk powder to make the blend dairy-free, or simply use a dairy-free all purpose gluten free flour blend like Better Batter.
If you’d like to stick with this recipe using sour cream, I’d try the same swap for butter, and try replacing the sour cream with either Greek-style (strained and thickened) plain non-dairy yogurt, or non-dairy sour cream.
Gluten free, vegan crust
The only animal products in this or the other pie crust recipe are those derived from dairy. Since there’s no meat and no eggs, if you follow the instructions for making this recipe dairy-free, it will also be vegan.
How to make a gluten free pie crust without sour cream
To make this recipe without sour cream, you’ll need a different ratio of ingredients, with ice water in place of sour cream. The appropriate ratio of each of the ingredients for each single crust is:
- 1 1/2 cups (210 g) all purpose gluten free flour (including 3/4 teaspoon xanthan gum)
- Scant 1/2 teaspoon baking powder
- Scant 1/2 teaspoon kosher salt
- 6 tablespoons (84 g) cold unsalted butter, diced and chilled (alternatively, use Spectrum nonhydrogenated vegetable shortening or Miyoko’s Kitchen brand vegan butter, if you are opting for dairy-free).
- 3/8 cup (3 fluid ounces) cold water, iced (plus more as necessary; ice does not count in the volume measurement)
Multiply all the ingredients by two (2) to make two pie crusts for a double-crust pie or two single crusts for 2 single crust pies.
The instructions for making this version without sour cream are nearly identical to making the crust with sour cream as described fully in the recipe below. Simply follow the same instructions through step 2, and use these instructions for steps 3 and 4:
Step 3: Create a well in the center of the dry ingredients with the butter shards, and add 3/8 cup (3 fluid ounces) of ice cold water (without the ice). Using a large mixing spoon, mix the ingredients together to moisten the dry ingredients. The dough should be shaggy and somewhat crumbly.
Step 4: Knead the dough together with clean hands until it begins to come together. Add more ice water by the teaspoon as necessary for the dough to hold together. Add the water carefully, by the drop, and only to the parts of the dough that are dry, crumbly, and completely without moisture, and gently knead it in with clean hands.
Smooth and shape the dough just as described in the recipe below. All the other instructions are identical.

Try my recipe and let me know what you think
My flaky gluten free pie crust recipe is virtually fail-proof and enjoyed by many avid bakers who are living and thriving on a gluten free lifestyle.
If you are new to a gluten free diet, learn about all the many benefits of following a gluten free lifestyle. You’ll find a wide range of delicious recipes on my blog to ease you into cooking and baking, gluten free.
FAQs
Yes, this extra flaky gluten free pie crust dough can be wrapped tightly in plastic and chilled for up to three days in your refrigerator before you are ready to make your favorite gluten free pie recipe. If it seems too hard to roll without cracking, allow it to sit in the plastic wrap at room temperature for a few minutes to warm up before you attempt to roll it again.
I have used this extra flaky gluten free pie crust for my classic apple pie recipe, pecan pie recipe, chocolate chip pie recipe, and coconut cream pie recipe – all of them gluten free! You can also bake up the best of summer’s stone fruits and fill this gorgeous crust with all your favorites.
Simply store your baked or unbaked pie crust or dough in the freezer for two months, or until you need it. Be sure to wrap it very tightly in freezer-safe plastic before freezing so it doesn’t dry out. Let it gently defrost in the refrigerator overnight before rolling it out, parbaking it or adding your filling in preparation for baking.
The secret to an extra flaky gluten free pie crust is adding a bit of cold sour cream to the mixture. The sour cream’s high-fat content and tangy acidity help create extra tenderness without compromising any layered flakiness.
Yes, you can bake this crust in a glass pie pan, which will allow you to see the bottom of the crust and accurately judge how much it has browned. Baking in glass is similar to baking in porcelain, as both retain heat very well, so watch carefully to ensure you don’t burn your crust.
I don’t recommend making this pie crust using anything other than a bowl and a spoon, since that makes it possible to create large but flat solid pieces of fat that are evenly distributed throughout the raw dough. That’s how you get those layers!
The common method of making the pie crust into “pea-sized pieces” tends to make tougher crusts. If you must use a food processor, process the dough as little as possible. If you do decide to use a stand mixer, use the paddle attachment and don’t overmix!
If you’re parbaking your crust, as directed here in this gluten free pie crust recipe, you’ll know it’s done baking when it is very lightly golden brown on the edges. The bottom of the crust should only be less shiny, but not browned, which will finish when you fill and finish baking.
Extra Flaky Gluten Free Pie Crust
Prepare an extra flaky, gluten free pie crust when you follow this recipe. Whatever pie you’re craving, this is the only gf pie crust recipe you need.
Yield: 1 10-inch pie crust
Prevent your screen from going dark
Ingredients
- 1 ½ cups (210 g) all purpose gluten free flour blend I highly recommend Cup4Cup, my Better Than Cup4Cup blend, my Mock Cup4Cup, or my Better Batter Pastry Hack blend, plus more for sprinkling
- ¾ teaspoon xanthan gum omit if your blend already contains it (use a heaping 3/4 teaspoon)
- ¼ teaspoon baking powder
- ½ teaspoon kosher salt
- 6 tablespoons (84 g) unsalted butter roughly chopped and chilled
- ½ cup (120 g) sour cream full fat, preferably, chilled
- Ice water by the teaspoonful as necessary
Instructions
Make the pie crust dough.
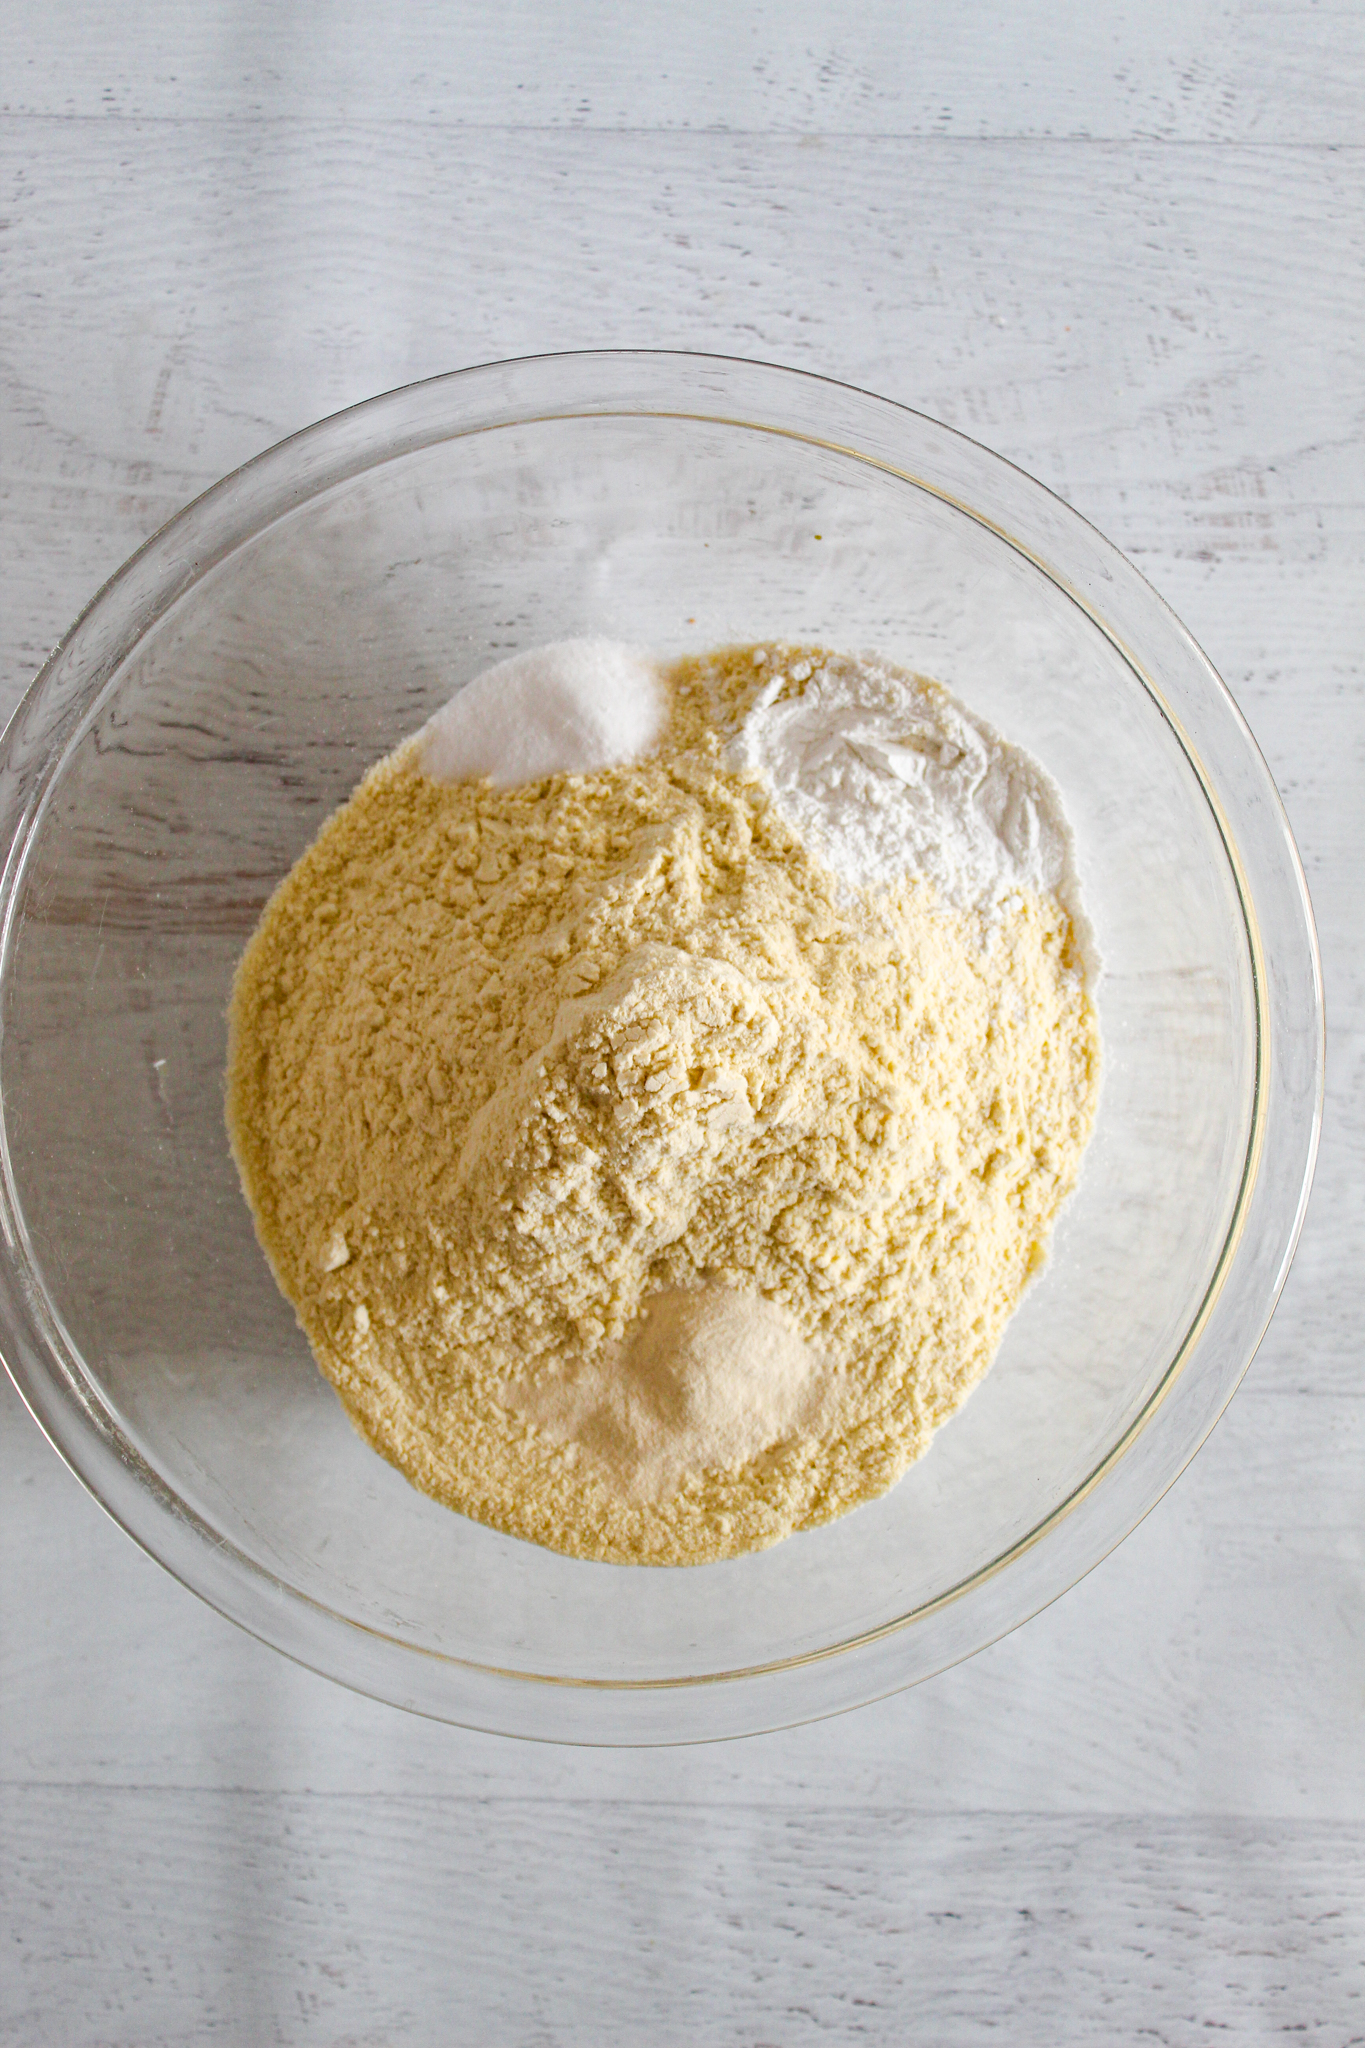
In a large bowl, place the flour, xanthan gum, baking powder and salt, and whisk to combine well. Add the chopped and chilled butter, and toss to coat it in the dry ingredients.
Flatten each chunk of butter between your thumb and forefinger to make flat shards of butter, coated fully in flour.
Create a well in the center of the dry ingredients with the butter shards, add the sour cream, and mix to moisten the dry ingredients with the sour cream. The dough should be shaggy and somewhat crumbly.
Knead the dough together with clean hands until it begins to come together. Add ice water by the teaspoon only if necessary for the dough to hold together.
Turn the dough out onto a sheet of plastic wrap, and press into a disk as you close the plastic wrap around the dough. It will still seem rough. Place the dough in the refrigerator to chill for 30 minutes.
Preheat your oven to 375°F. Grease a 9-inch metal pie plate generously and set aside.
Smooth out the chilled dough.
Once the dough has chilled, turn it out onto a lightly floured piece of unbleached parchment paper. Sprinkle the dough lightly with more flour, and roll it out into a rectangle that is about 1 inch thick, moving the dough frequently and sprinkling it lightly with flour if it begins to stick.
Fold the dough over on itself like you would a business letter. Sprinkle the dough again lightly with flour, and roll out the dough once again into a rectangle about 1 inch thick.
Twice more, remove the top piece of parchment paper, sprinkle lightly with flour, and fold the dough over on itself like you would a business letter.
Shape the dough in the pie plate.
Roll out the dough into an approximately 12-inch round, about 3/8-inch thick. Roll the pie crust loosely onto the rolling pin and then unroll it over the prepared pie plate.
Trim the roughest edges of the crust with kitchen shears. Lift up the edges of the pie crust gently to create slack in the crust, and place the crust into the bottom and up the sides of the pie plate.
Tuck the excess pie crust under itself, and crimp the edge gently all the way around the crust by pinching the dough at regular intervals with one hand, and creating a crimped impression with the forefinger of the other hand. Cover the pie crust with plastic wrap and place it in the refrigerator to chill until firm, at least 30 minutes (and up to 3 days).
Parbake the crust.
Remove the pie crust from the refrigerator and unwrap and discard the plastic. Pierce the bottom of the pie crust all over with the tines of a fork.
Place a sheet of parchment paper on top of the raw crust and cover the bottom of the crust with pie weights or dried beans.
Place in the center of the preheated oven and bake until the crust is lightly golden brown on the edges, about 10 minutes.
Remove the pie weights and parchment and allow the crust to cool before proceeding with your recipe.
Notes
- 1 1/2 cups (210 g) all purpose gluten free flour (including 3/4 teaspoon xanthan gum)
- Scant 1/2 teaspoon baking powder
- Scant 1/2 teaspoon kosher salt
- 6 tablespoons (84 g) cold unsalted butter, diced and chilled (alternatively, use Spectrum nonhydrogenated vegetable shortening or Miyoko’s Kitchen brand vegan butter, if you are opting for dairy-free).
- 3/8 cup (3 fluid ounces) cold water, iced (plus more as necessary; ice does not count in the volume measurement)
Nutrition
Calories: 1588kcal | Carbohydrates: 172g | Protein: 12g | Fat: 90g | Saturated Fat: 55g | Polyunsaturated Fat: 3g | Monounsaturated Fat: 23g | Trans Fat: 3g | Cholesterol: 248mg | Sodium: 1492mg | Potassium: 172mg | Fiber: 10g | Sugar: 4g | Vitamin A: 2816IU | Vitamin C: 1mg | Calcium: 196mg | Iron: 0.2mg

Thanks for stopping by!
Hi, I’m Nicole. I create gluten free recipes that really work and taste as good as you remember. No more making separate meals when someone is GF, or buying packaged foods that aren’t good enough to justify the price. At Gluten Free on a Shoestring, “good, for gluten free” just isn’t good enough!
